Aerial drones are becoming more and more popular. Especially the upcoming DJI Mavic Pro will surely set off a reign in the market. Our flying friends group has already booked more than 20 people, of which only 2 were the first to purchase. Therefore, I would like to share some of my personal experience with everyone in safe flight and night shooting.
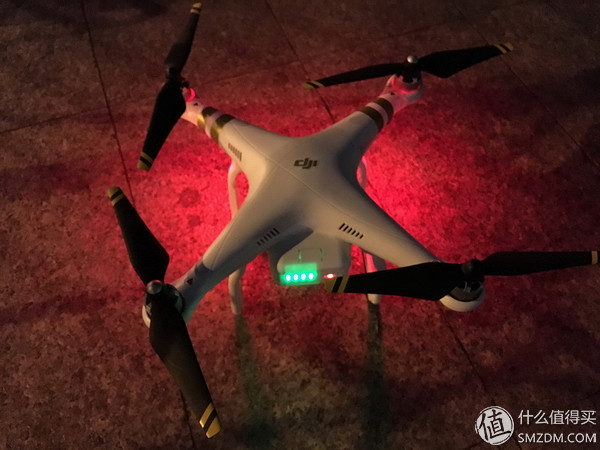
Preparation before night shootingThe number of flying friends who go out to shoot at night will be much less than the number of people flying in the daytime. Because of the night shooting, almost photography enthusiasts only shoot the city's lighting effects for the night. For those flying friends who are not yet familiar with it but want to try it, please be sure to take a closer look at the preliminary preparations. 1. The drone's battery and remote control ensure full charge. The battery does not have a bulging phenomenon. Most people will pay attention to the aircraft battery, and the remote control is easily overlooked. 2. Check the blades again and check if there is any damage in the backpack or if there are two pairs of positive and negative blades . (Don't bother me, this is a case that happened in practice.) 3. There is a large temperature difference between morning and evening. Prepare a coat for yourself. (For 10/10 demons, I'll fly out in the evening. The hand is a bit Frozen feeling), a pair of half-finger gloves, battery cooler (temporarily not available, other areas decided according to the outdoor temperature), a warm baby (that is, you can give the battery insulation and can paste yourself to provide the heat , At low temperature, it can also keep the mobile phone & iPad easily turned off. 4. Are all the other accessories complete, especially: TF cards (the blood and tears of flying friends in the group). It's best to put everything in one place and start to see if everything works. Sometimes, firmware upgrade reminders are also quite annoying.
Prepare before take-offTaking off at night, especially for night scenes, most of the (99%) cases are over-the-horizon flight, so you need to be ready for a one-click return. There are not too many obstacles around the take-off point, no crowds, no high-power signal towers, which are necessary for safe flight.
Step by step, put the drone up and remind again. When padding, pay attention to black and white not to be mistaken.
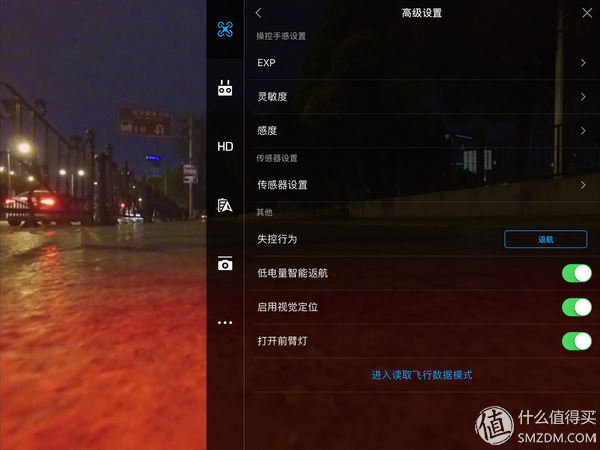
Second, night shots need to be in DJI GO's advanced settings in order to be effective.
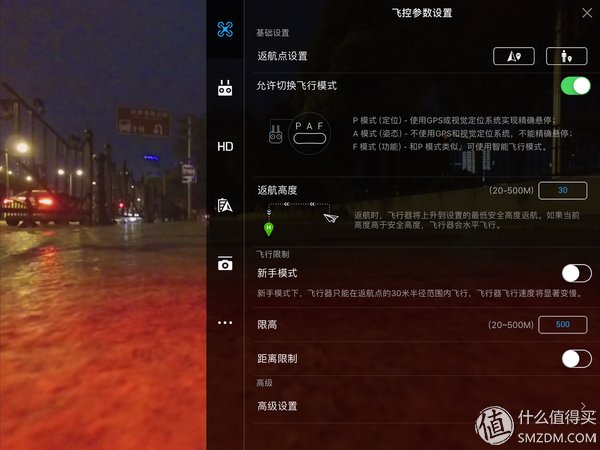
Turn off the forearm lights, but this means that only 2 lights are provided for your reference.
Night shooting, if you want to shoot video, it is really not recommended, here special DJI Wizard series. The effect will be appalling. If you don’t believe it, let’s look at a video (ISO3200, default adjustment value)
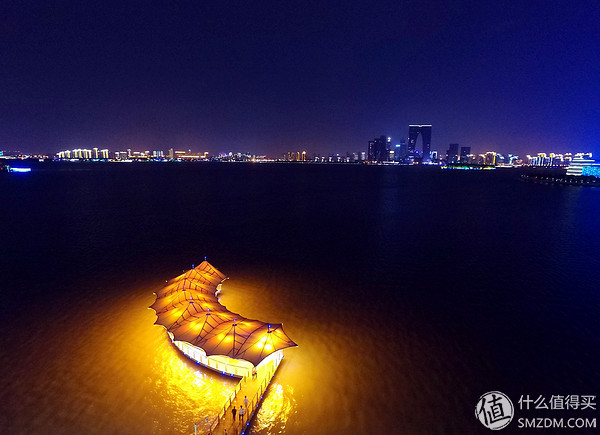
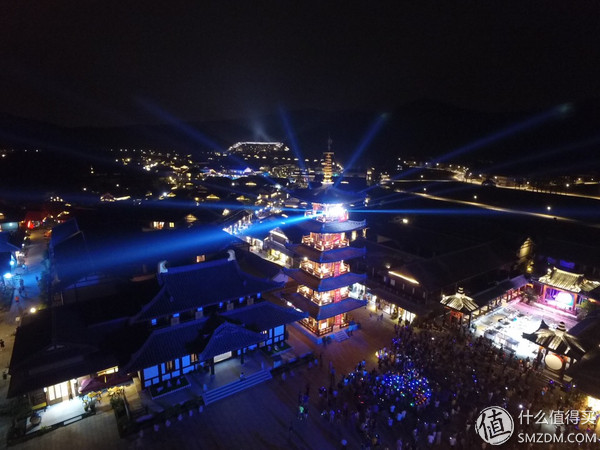
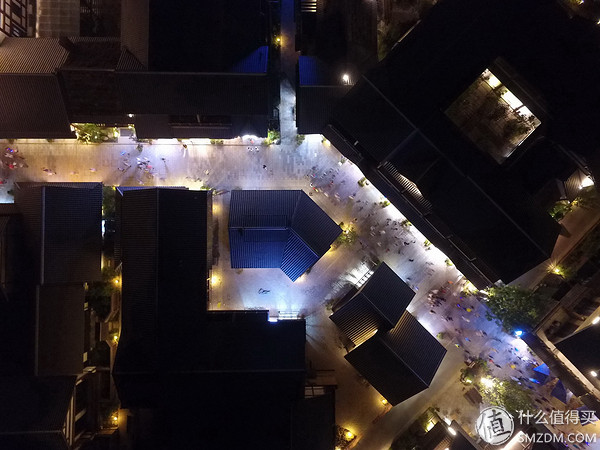
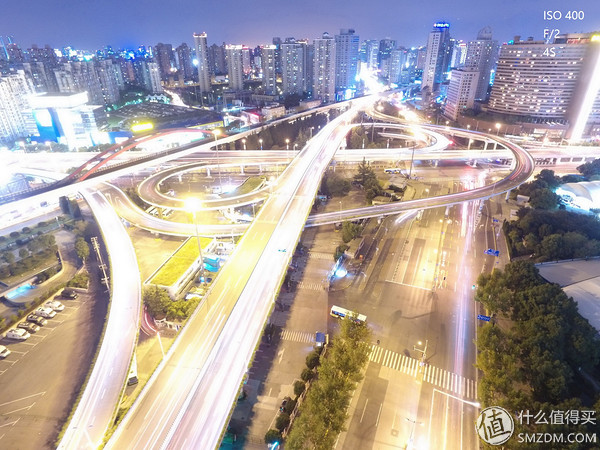
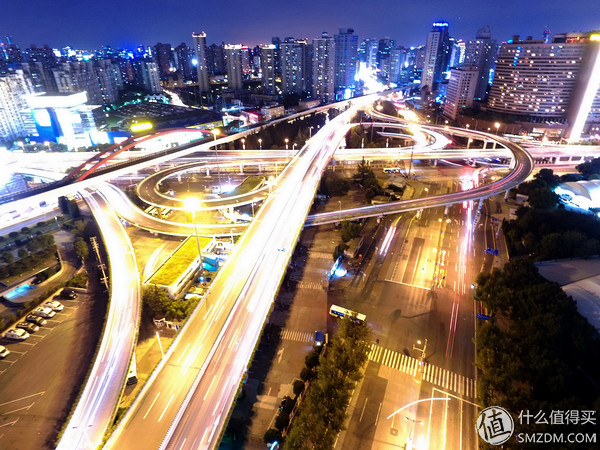
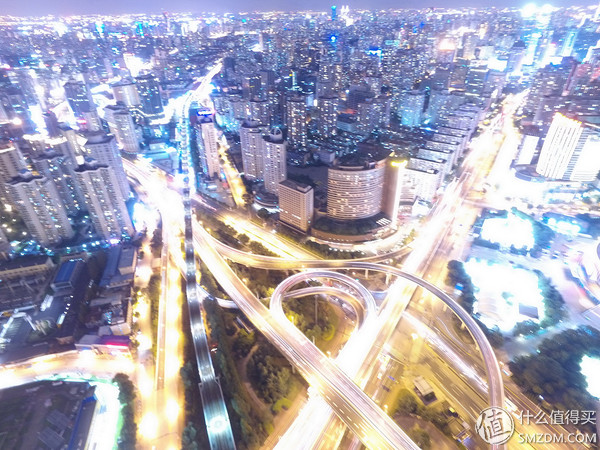
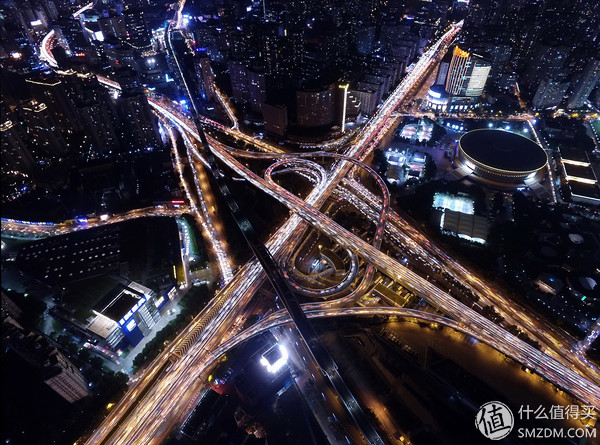
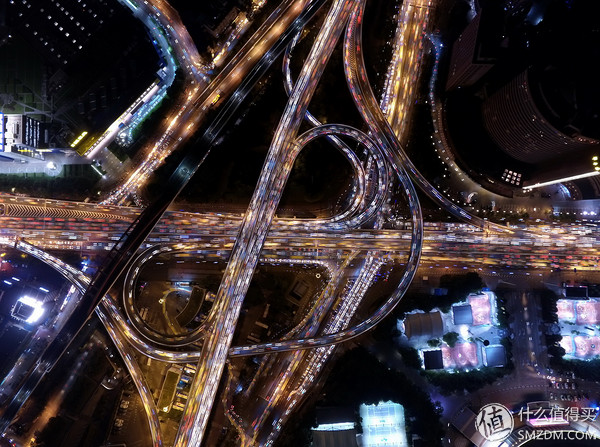
With photo shooting, the degree of freedom is much higher. Let's take a look at the few pictures I took before. Can you see where this is?
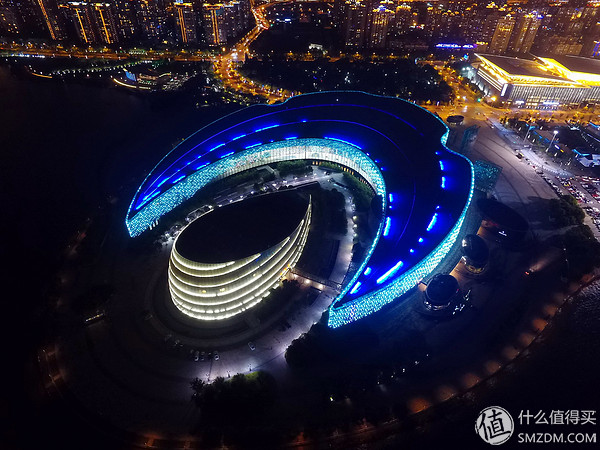
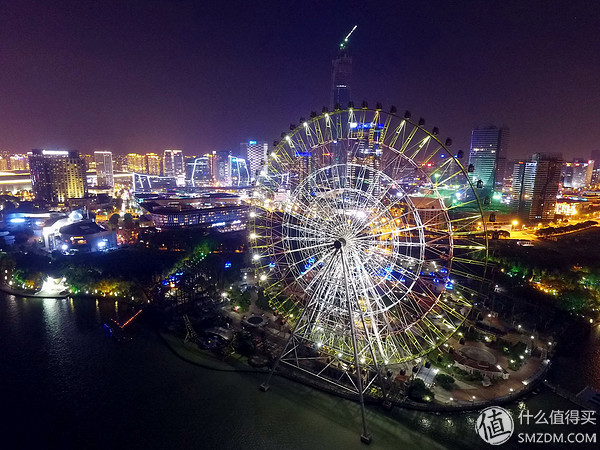
Some buildings look like
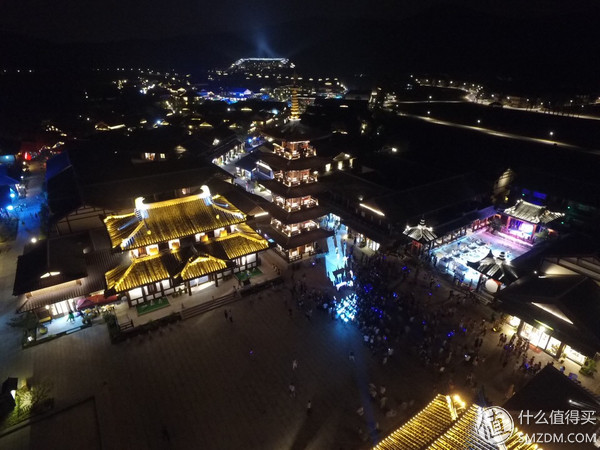
But when you wait a little longer, there will be unexpected scenes. At this time, pre-judgment work will be done in advance to maintain enough electricity (after a general take-off, about 20 minutes will be valid).
In addition, the corners of some streets will also be rewarded.

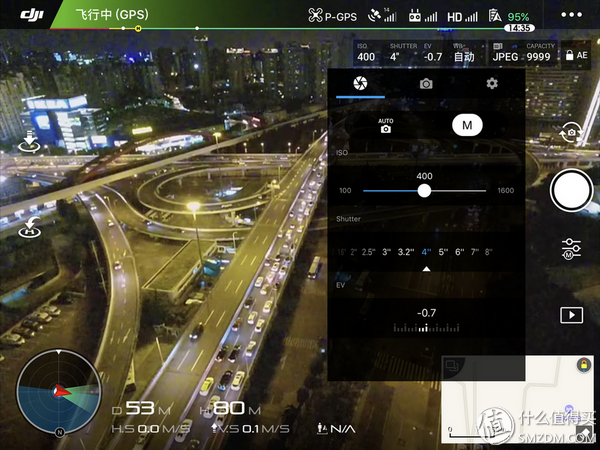
Night shot, if the Auto file, ISO is often relatively high, unpleasant and slow shutter speed, making you uncertain.
This noise is more

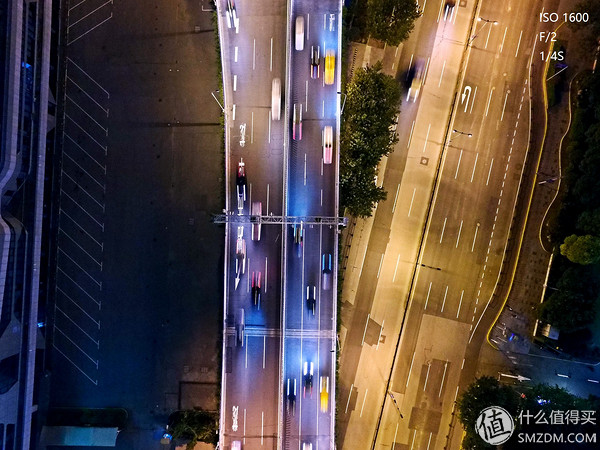
Since the camera aperture of the DJI Fairy Series is a fixed F/2, you can adjust only the ISO and shutter speed. During the daytime, you can increase/decrease the EV, even if you can quickly shoot in the AUTO file. Obviously this method is not very convenient at night. This time will be based on the actual situation, using the M file to shoot.
First look at an exposure 6S photo, apparently exposed exposure. In the M file, DJI's metering system is obviously not very reliable. It only has to try more, or use the bracketing method to shoot.
Of course, you can also alleviate the problem of overexposure through post-PS.
In another place, the exposure time is 4S, which seems to be more serious. So this part is more of photography. Can only rely on more shots and more exploration.
Under the 4S exposure, the light strip effect of the lights has come out. So I'm also considering whether to solve the overexposure problem by using a lower ISO or adding ND filters later. The shutter speed can be increased, for example, 1S, or even faster, but the effect of the car lights will not come out, even if the stack is done late. I tried it the day before, so...
A long-term exposure, there will be an unpredictable problem is that jitter. Although DJI already has a very good flight control system and advanced electronic systems such as PTZ, in the air, it will inevitably encounter the impact of wind. Then the photo you received was basically a waste movie. If a flying friend wants to take a 360° panoramic photo, this issue should be taken into account.
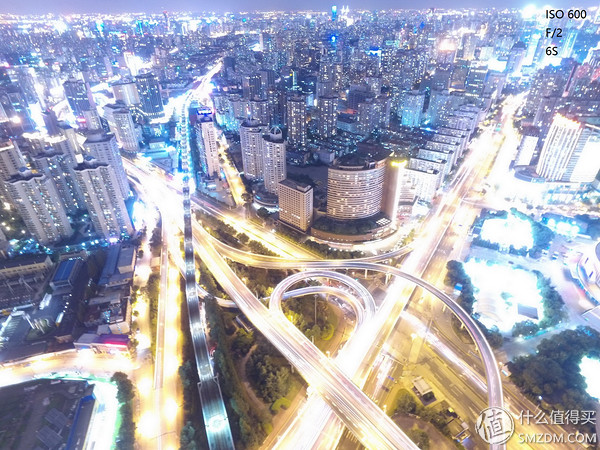
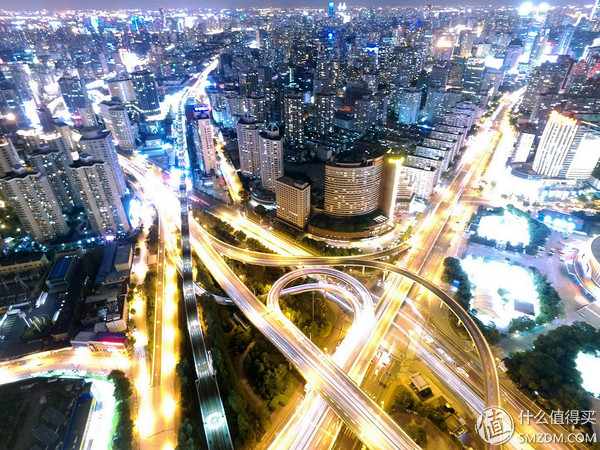
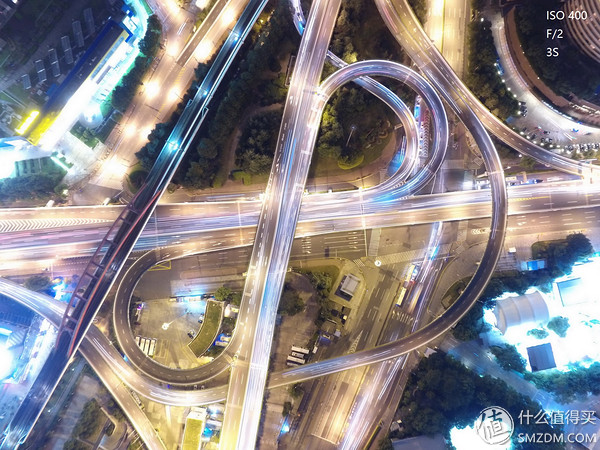
The photos I shot in the same location (stack and effect) on the previous day were described below if shooting and post processing.

The lens is slightly down. Due to the limitations of the site's largest picture, the photos were compressed and the details were not enough. In the original map, buildings, traffic lights, etc. are still very "fine".
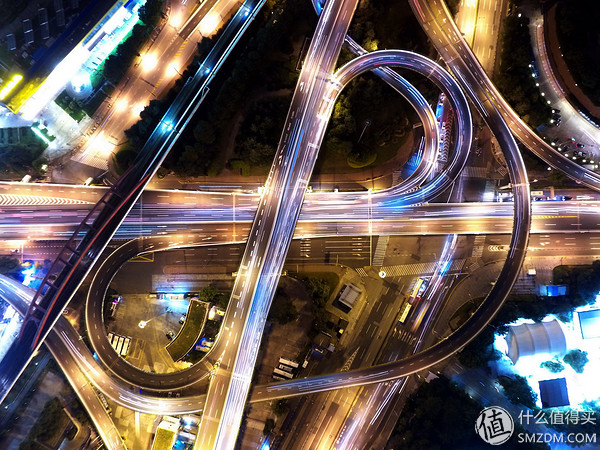
Does the effect of the above 2 stacks look good? Let me tell you the specific method.
In the first step, switch to the M position and select the exposure you desire (ISO and shutter speed). Normally you can set it lower.
The second step, in the shooting mode, changing from single shot to regular shooting, the interval time according to your shutter speed (interval time> shutter speed, such as shutter speed 4S, then you need more than 4S interval time).
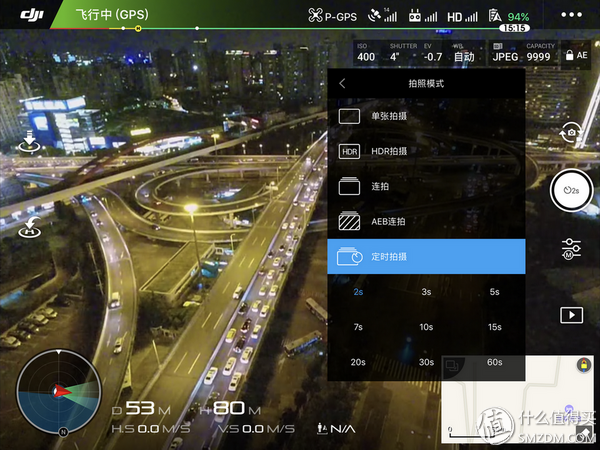
Then you can take continuous shots at your chosen location. Note that for long exposures, the screen on your remote control is black when exposed. Normal, no stress.
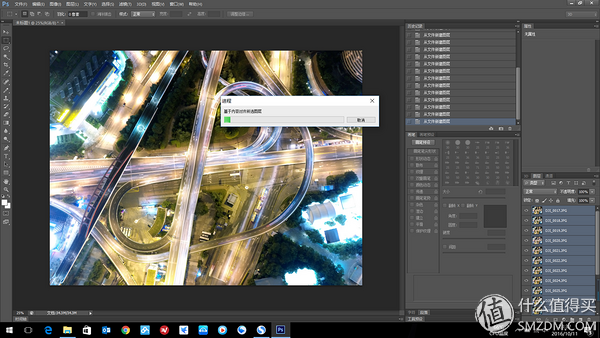
Stack post-processing methods
Open PS, then look at the picture, and I've marked it with a red box.
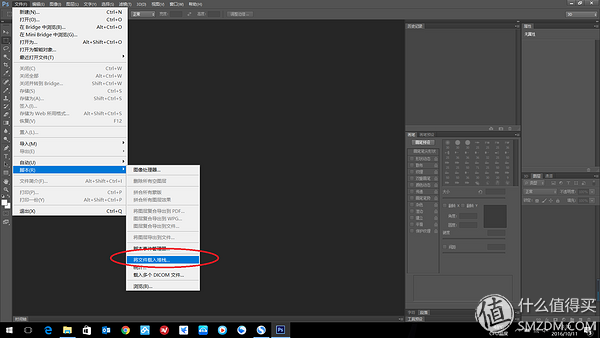
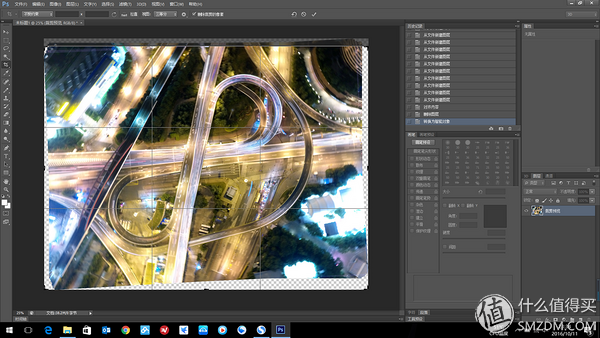
Select all the pictures that need to be stacked (it is recommended that you manually filter them first and remove all the obvious obscure ones), and check the two options in the red box.
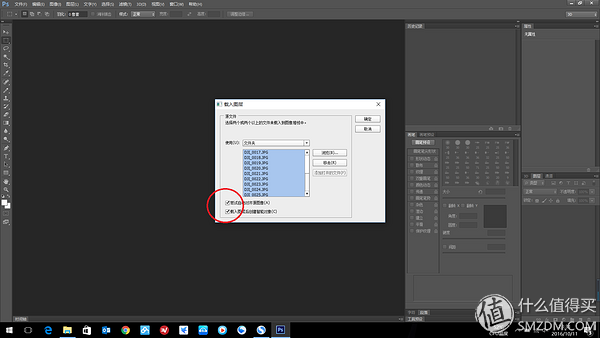
At this time, it is processed automatically according to your computer's processing power.
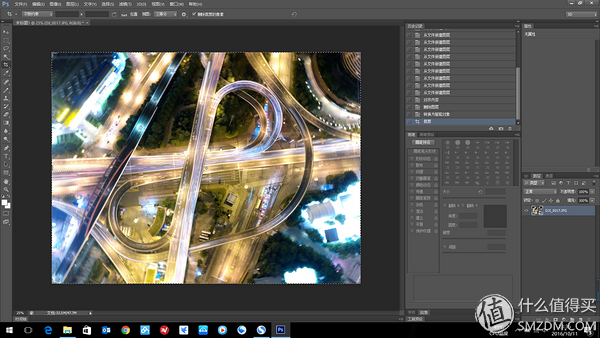
The first time you finish processing, it automatically helps you align all of these photos. (After aerial photography, it is almost impossible to remain in the same place for several minutes due to various factors.) So if you move more, you have to trim more. This is a photo that was exposed for 3 seconds. The photo that was exposed on the previous day was 1S, and the part that needed to be cropped was significantly less.
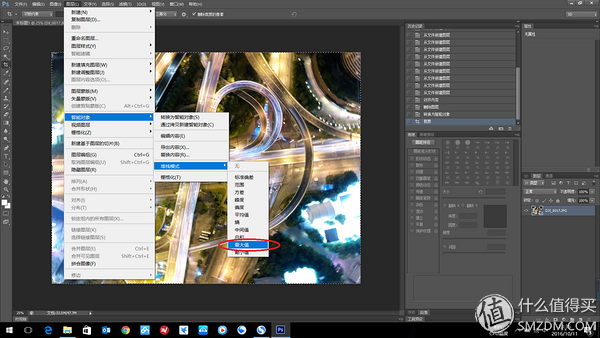
After cutting
This time you see the effect of the photo, not the final post-stack effect. At this time, you need to do the effect of the stack. Generally I use the maximum value.
It's computer processing time and it needs to wait

The original film before processing
PS after the original film
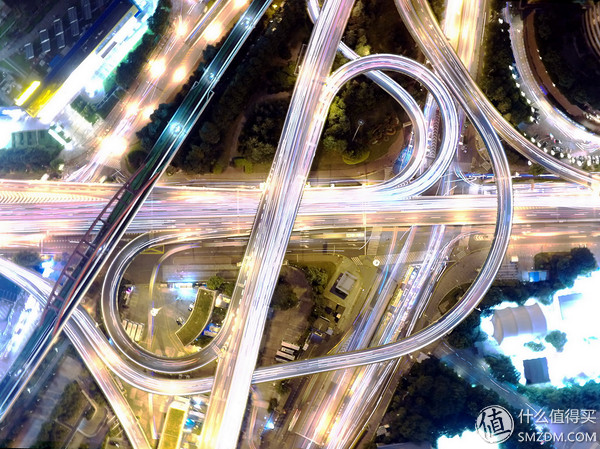
Stacked photos
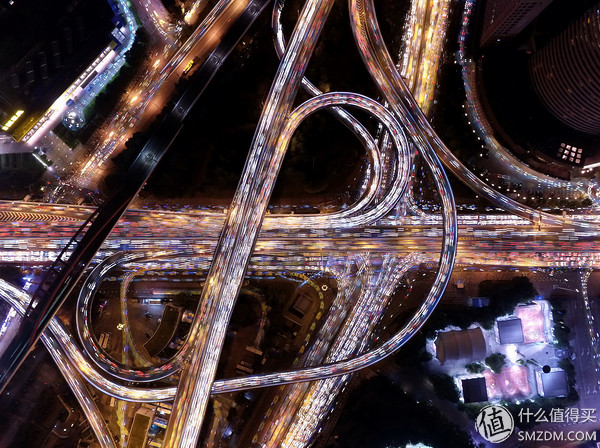
It is also a fumbling stage, and the shutter speed, the shooting environment, and the lighting effect of the car also require more shots. The following 2 sheets are stacks of 1S exposure time on the previous day.
1s exposure time is obviously too short, 3S exposure time, but also a bit too much exposure. Looks like it is still considered to minimize the ISO, plus a block ND filter to try it.
UAV night shoots require more photography skills. For unfamiliar places, after drones are flying, it is recommended that the first battery fly around briefly, look at the general environment, and the scenes that you want to capture, including cameras. The position, height, and whether there are adverse effects on the remote control. If there is a surplus "Power" can try to take a few photos, and then see if it is satisfactory. The second battery will fly to the designated camera for the shortest time. In the later period, it is absolutely necessary to see if you need PS. I hope to help photographers fly for each hobby.
Braided Wrap Around Sleeving,Braided Split Loom For Cable Harness Protection
1. Braided Wrap Around Sleeving offers innovative solutions for the protection of breakout areas
and provides easy removal when is necessary an inspection or maintenance of cables.
2. The special open structure allows to be installed after other components, for example copper terminals and connectors.
3. A strong resilience protects wires and cables and meanwhile provides exceptional abrasion and flame resistance.
PET Wrap provides the same flexibility and abrasion resistance as the PET Expandable Braided Sleeving but with the added feature of a hook and loop closure running the length of the material.
This allows you to work on segments of the cabling, rather than having to remove the entire covering and re-run all of its contents.
Cable Loom Wrap,Black Cable Sleeve ,Corrugated Tube Split Loom,Braided Wire Loom For Wire
Shenzhen Huiyunhai Tech.Co.,Ltd , https://www.hyhbraidedsleeve.com