OFweek smart home network news need to disassemble the screws, with a red circle note. Use the green arrow to indicate the removal direction.
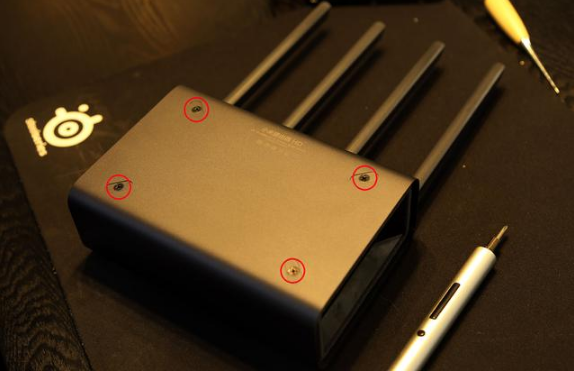
4 mats, oh! Leak out 4 screws.

Remove the nameplate sticker and there are two screws below.
The mats are easy to handle and the stickers are sticky and easily damaged. It is recommended that the hair dryer be heated before it is torn off.
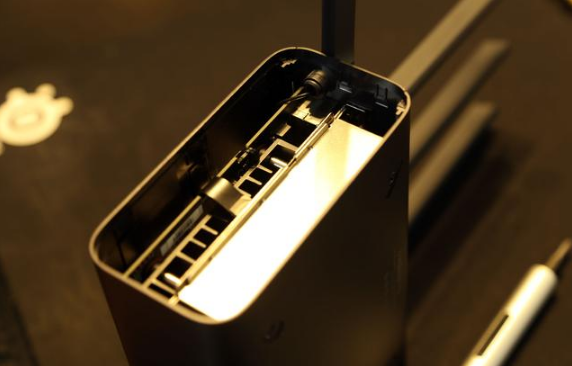
Remove the plastic vents on both sides. There are 4 snaps on each side. pry! Deformation toughness (very) strong, bold force.
Note that the two sides of the buckle are not in one position, that is, the left and right sides and the installation direction are distinguished. Take care when you replace it.
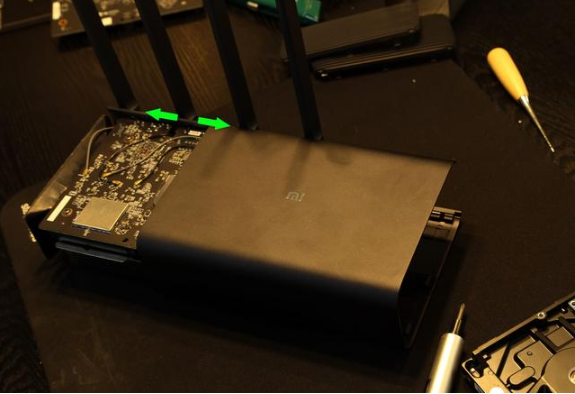
The aluminum shell is removed by "drawing".
Note that it is drawn from the fan duct outlet.
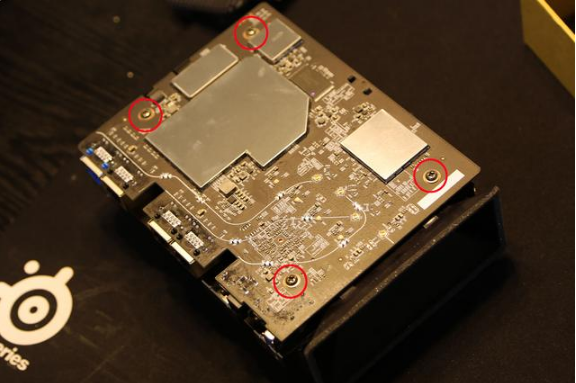
Do not rush to remove the 4 screws on the motherboard after removing the cover.
Next is the only difficulty in R3D replacement hard disk dismantling process, hard disk SATA port adapter cable.
This part requires patience and a few more drawings.
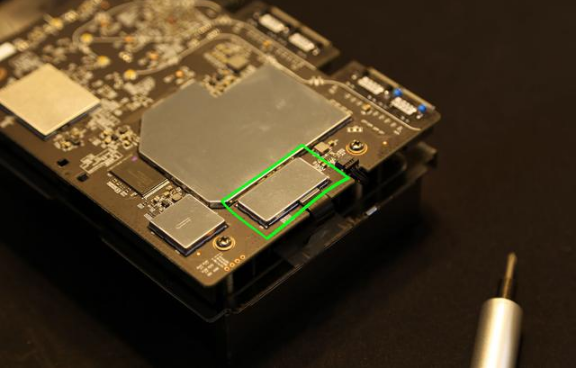
Remove the protective cover first. pry. There is no component on the board around the protection cover, and the possibility of dismantling is very small.
Recommended tools use a thin lot of words. The ring protection cover is evenly lapped, not too much at one angle.
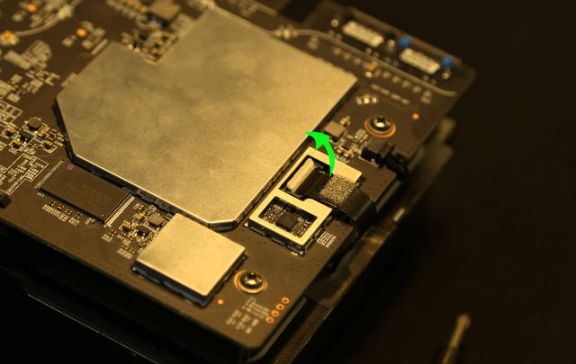
After removing the protective cover, look at the cable and look at the direction of the arrow to open the 90° cable clip.
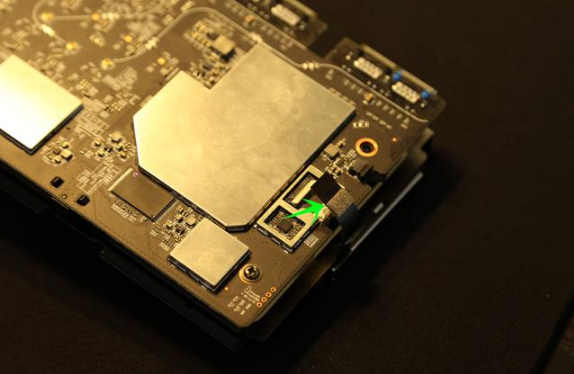
Not finished yet. Removing the cable does not drop in the horizontal direction but lifts it in the vertical direction.
Remove the cable, you can remove the motherboard.
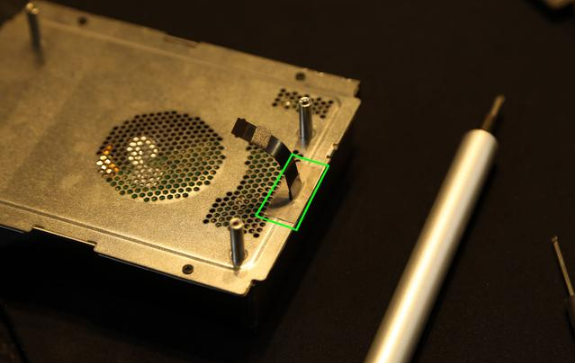
Hard disk compartment part, there is reinforcement protection line stickers.
Take it down. There is no need or suggestion for a hairdryer. Overheating will damage the fragile cables. Raw tear!
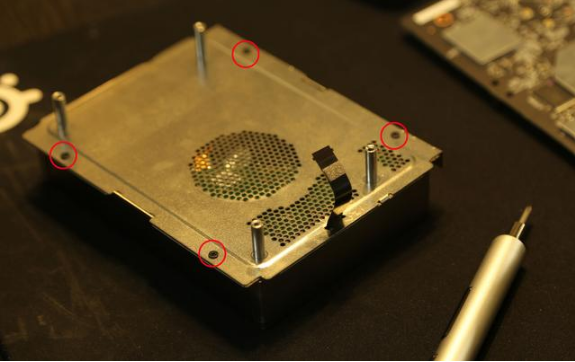
Remove the protective sticker and remove the 4 screws from the hard disk compartment.
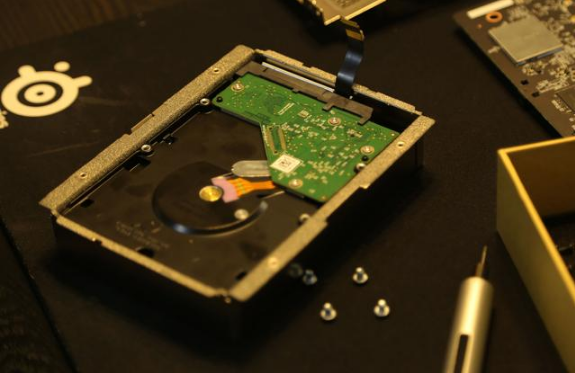
Finally saw the hard disk to be replaced.
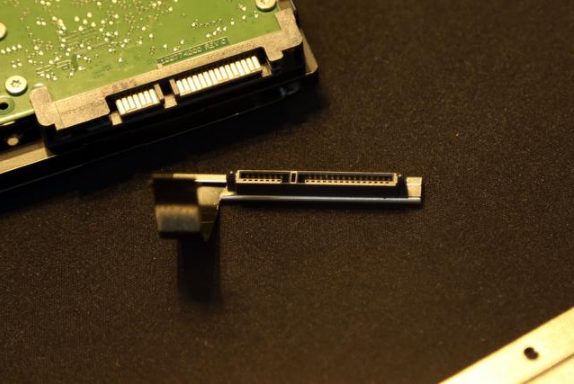
Take out the hard disk and remove the SATA patch cable. Install the cable to the replacement hard disk.
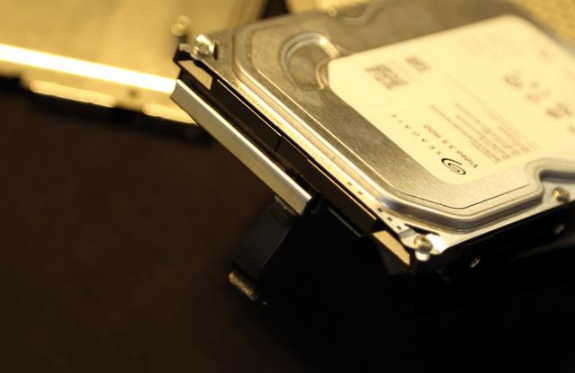
Don't worry about the hard disk compartment volume.
Because R3D has 8TB version. Therefore, the space inside the cabin is rich, and the 3.5′′ thick plate can be easily installed.
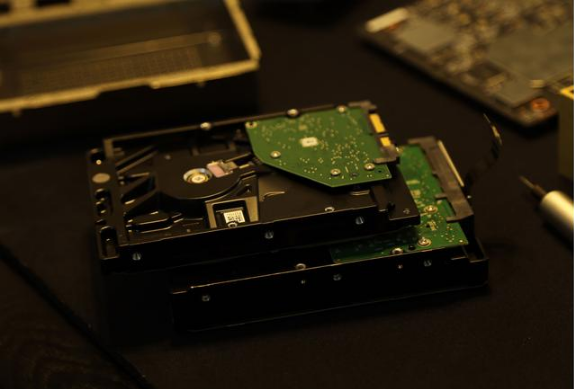
At this point, the reverse order can be replaced.
Precautions:
1, cable! Cable! Cable! For those who have disassemble experience, hands-on ability friends, this part is not difficult.
But inexperienced friends must be patient when removing the cable! patient! patient!
2. Replace the hard disk does not need to disassemble the antenna. However, care should be taken in the disassembly/reassembly process so as not to damage it.
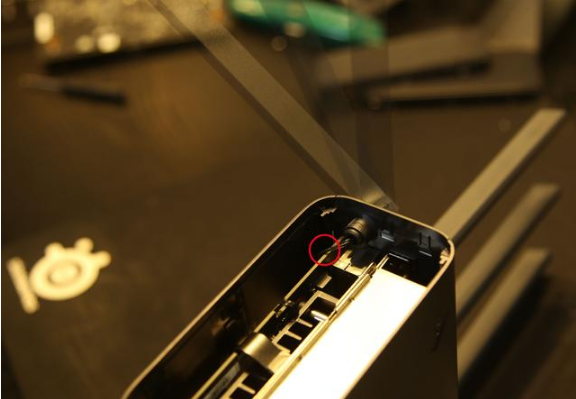
The left-most antenna connection is stuck on the edge of the motherboard. The edge of the PCB can be described as "sharp." In the invisible part, this part is worn when turning the antenna. When disassembling, you must pay attention to not being forced here.
3, R3D replacement hard drive, respectively, in the shell, motherboard, hard drive warehouse remove 2+4 * 3 groups, 14 screws. These 4 parts screws are not common to each other. It is recommended to differentiate placement.
The hard disk is replaced. After installing it, enter the management page.
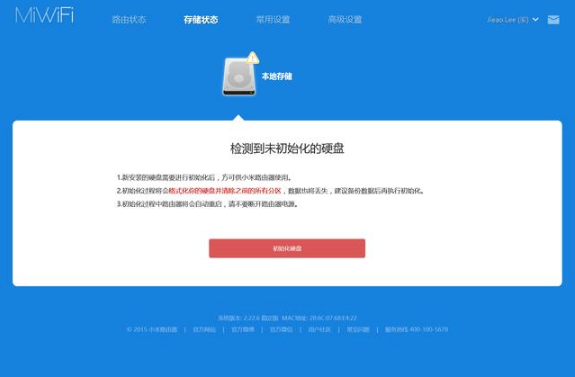
An uninitialized hard disk is automatically detected in the "storage status".
Due to the Mi router's underlying Linux, the hard disk format is EXT4. Click "initialize" the hard disk, 2-3 minutes (4TB) to complete the initialization. The initialization operation is equivalent to formatting and will erase all the contents of the hard disk.
Regarding the choice of hard disk, you don't have to be too obsessed with performance.
In fact, R3D, which is a "pseudo-NAS," provides limited functionality and does not require high performance on the hard disk.
The 1TB version of the internal hard drive is (currently) Seagate Video 3.5. The "HD disc" in the broad sense is characterized by quiet, stable, and high durability. The model is ST1000VM002, SATA3/5900 rpm/64M cache.
Default 1TB hard drive test:

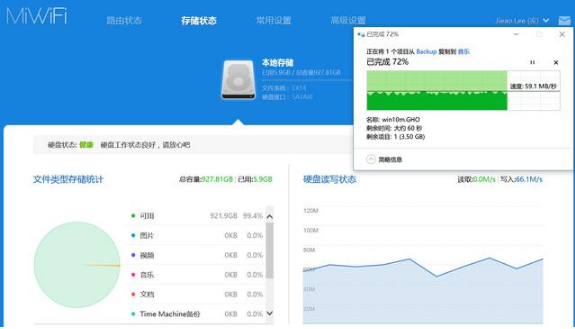
Read 110m/s, write 60M/s. The test environment is a wired connection (six gigabit lines).
Replace Western Digital 4T Purple Pan.
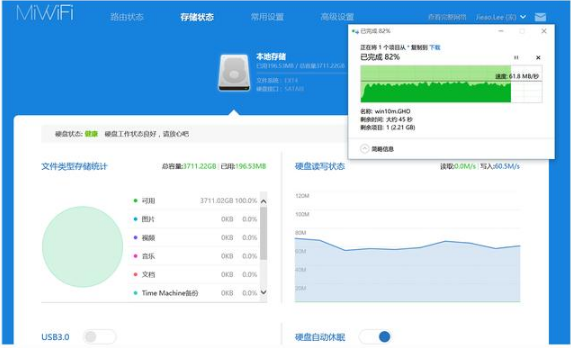
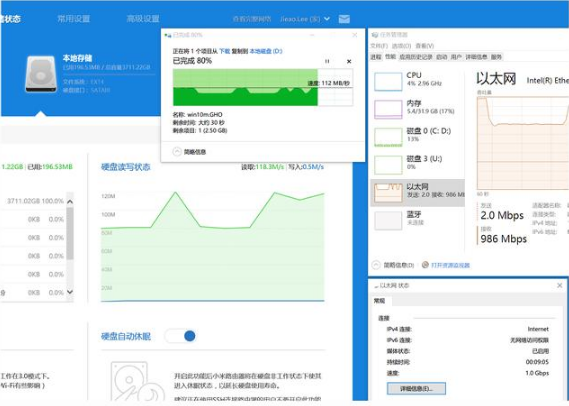
Read 110m/s, write 60M/s. Same performance as the default 1TB.
In fact, 110m/s is almost the maximum transmission of Gigabit switching. The write bottleneck does not lie in the hard disk.
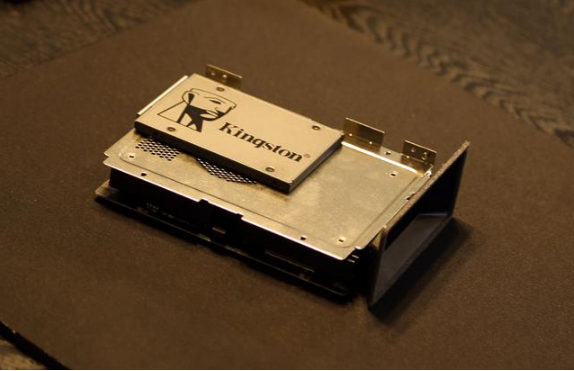
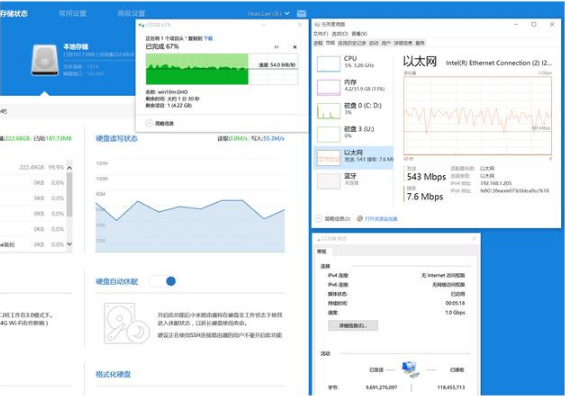
Even if R3D is equipped with SSD, its read/write performance is also not improved.

Last Tucao, R3D (HD) version is currently difficult to buy.
For Oppo Touch,Front Touch Screen Glass,Touch Screen For Reno 3 Pro,Glass Touch Screen For Oppo
Dongguan Jili Electronic Technology Co., Ltd. , https://www.ocasheet.com